I'm so excited! I've just had a spark of an idea which has led me to plan what I'm going to be making as my pay it forward gift(s). I'm itching to make a start on it/them but I've got Christmas knitting still to finish so will have to make myself wait for the new year.
I'm not giving any clues as to what I'm going to be making :o)
So far I only have one of my 3 PIF slots filled (thanks Crafty librarian!). That means there are two still open. Any takers??
Sunday, 9 December 2007
Pay it forward gift(s)
Tuesday, 4 December 2007
Garter stitch, stripes, kitchener stitch, perseverance, but mainly stupidity
I did it! I finally managed to graft my garter stitch stripes! I tried to do this sooo many times! Each time failing miserably. I have a bruise on my forehead from where I just slapped myself when I realised what was wrong. It was all my own stupid fault! I had the technique right all along!!
Short answer:
I hadn't taken into account the cast on row. I'd basically cast on then knit two rows of black, two of red etc. Essentially, I had created three initial rows of black instead of two. No wonder it wasn't coming out right!! Curses!!
Long answer: (which will hopefully keep my stupidity at bay next time I need to do this)
This is what I had in front of me, two row high black and red garter stitch stripes. I cast on and started off with two rows of black, carried on red, black etc until the desired length and ended with one row of red - the graft making up the final red row (and I thought I was clever for having working that out!).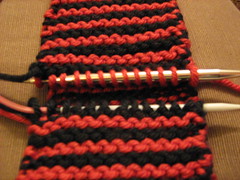
I found instructions for how to graft garter stitch and followed them. I got the right set of red double bumps but an extra set of black - I thought that the black bumps should have been on the wrong side, rather than the right side, so tried again. And again. And again... I lost count of the amount of times I tried.
Browsing through the Ravelry forums in despair, someone mentioned that there was a way of cheating at kitchener stitch! Trusty Google came to the rescue and I found these instructions:
http://pinklemontwist.blogspot.com/2005_12_01_archive.html (scroll down to Dec 22nd 05). Genius!! How to do kitchener without kitchener(ing).
It was through adding my extra contrasting coloured yarn rows that my mistake was detected. Things just weren't looking right, that extra row of black bobbles was still appearing. That was my d'oh moment. I unpicked the 'extra' cast on row and thing looked a LOT better!!
I still went ahead and tried this technique, even though, technically, following my initial kitchener instructions would now work...
This is how I started, two extra rows at each end of the graft in a contrasting colour.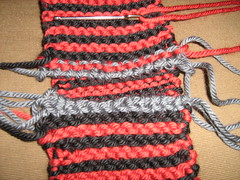
Then just follow the lead of the contrasting yarn for the weave of the graft. For some reason it felt more comfortable to do this from the wrong side, not sure why as it would have been a similar experience from either side...(although probably better to have done it the other way round so that tention of the stitches was visible).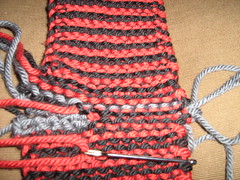
Completely zipped up.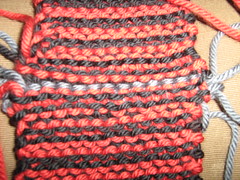
The zip from the right side...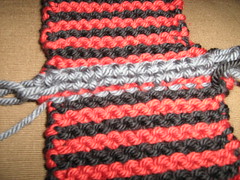
Unzipping the contrasting yarn all went very smoothly...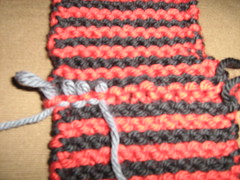
And there I have a finished graft...although those ends look a bit daunting...
How glad am I! And how cool is that technique! There was something very satisfying about unzipping that extra yarn and seeing the perfect graft appear. Although next time (next time!!?) I'll have my wits about me so I don't have any pesky extra rows getting in my way, and have a go at proper kitchener (not the cheat version).
...and relax.
Subscribe to:
Posts (Atom)